IRduino
An open source, programmable, Arduino-compatible USB infrared receiver that gives new life to old remote controls.
Introduction
Here we will take an example to show you how to use IRduino. I’ve got a TV remote by hand, and I want to control my PC via this remote. I notice there’s UP, DOWN, LEFT, RIGHT as well as an OK button on the remote, it’s very coincidentally that there’re such arrow key on the key board, so this example is to tell your PC press those key via IRduino and the TV remote, and the ok button will control the SPACE key.
Specifications
- Microcontroller: Atmega32u4
- Operating Voltage: 5V
- Flash Memory: 32KB of which 4KB used by bootloader
- SRAM: 2.5KB
- EEPROM: 1KB
- Clock Speed: 16MHz
- Remote Distance: >5m
- Remote Support: 95% of IR Remote on the market
Download the Code
About Arduino
Arduino is an open-source electronics platform based on easy-to-use hardware and software. It's intended for anyone making interactive projects.
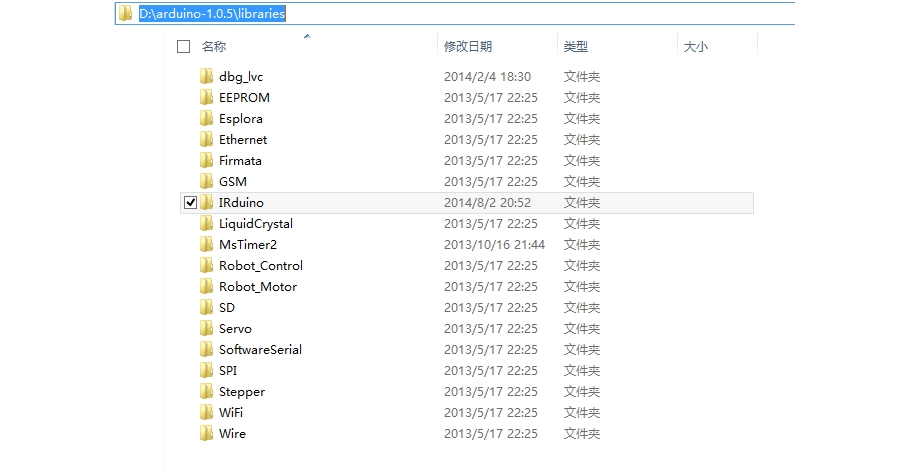
You can download the code at Github, it’s an Arduino Library. After download the code, extract it to the libraries folder of your Adruino. If there’s “-master” in the folder name, just remove it, otherwise it may cause some compile error.
Read Key Value of a Remote
IRduino can support almost all the IR remote on the market, include RV remote, Air conditioning remote and even your DVD remote. Open Get_IR_Code example on the examples folder of IRduino library.
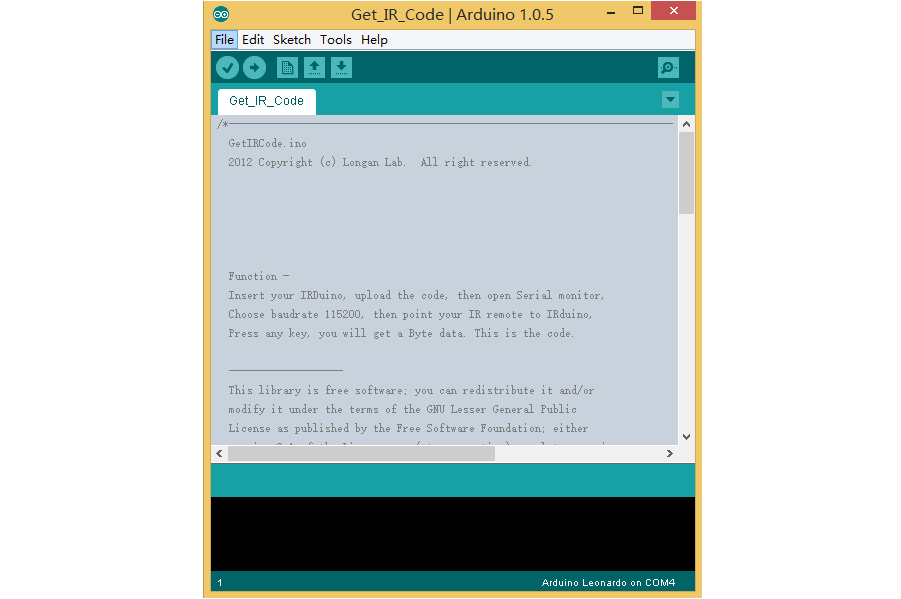
Tool -> booards to select Arduino Leonardo, then the right COM. Finally, upload the code to your IRduino.
Open Serial Monitor, press a remote key, then you can get something on the monitor:
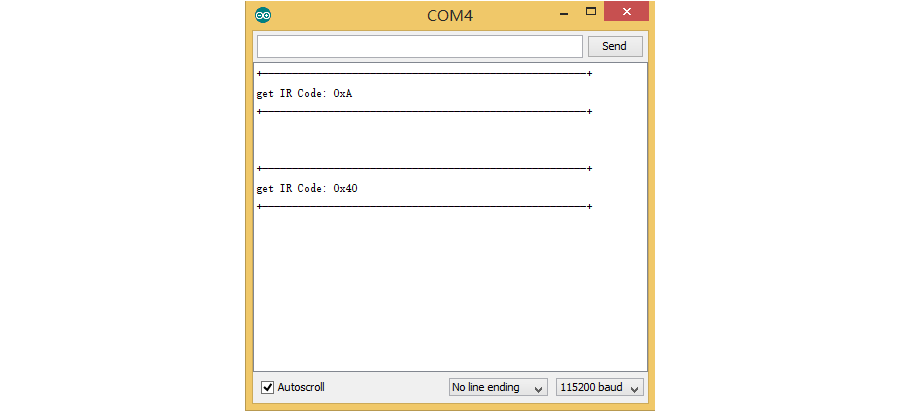
We can find that Serial Monitor had printed a Char type data, which is from 0x00 to 0xff. I had press two button, so there’s 2 key value on the above image, which is 0x0A and 0x40. Then in this way we can the values of the four button:
| KEY | NUM |
|---|---|
| UP | 0xEE |
| DOWN | 0xAE |
| LEFT | 0xCE |
| RIGHT | 0x8E |
| OK | 0x5E: |
Remember this value, which is important in the next step.
Write The Code
Don’t worry about the code, it’s easy just like you use an Arduino. Actually I had finish this example, now we learn about it. Open Task_Mode_Arrow example. Now here we goto the code. We notice the remote key value is used here:
// IR CODE DEFINE
#define IR_CODE_UP          0xEE
#define IR_CODE_DOWN        0xAE
#define IR_CODE_LEFT        0xCE
#define IR_CODE_RIGHT       0x8E
#define IR_CODE_SPACE       0x5E
Then the setup:
// add task item
IRduino.addItem(IR_CODE_UP, task_up);
IRduino.addItem(IR_CODE_DOWN, task_down);
IRduino.addItem(IR_CODE_LEFT, task_left);
IRduino.addItem(IR_CODE_RIGHT, task_right);
Here we add 5 tasks via the IRduino.addItem function. This function need two parameter, remote key value and a function pointer. Don’t know funciton pointer? Just forget it, actually it’s just the function name. As we had add four task, so we need 4 function, as following:
// add task

void task_up()
{
    iRduino.keyPressRelease(KEY_UP_ARROW);
}

void task_down()
{
    iRduino.keyPressRelease(KEY_DOWN_ARROW);
}

void task_left()
{
    iRduino.keyPressRelease(KEY_LEFT_ARROW);
}

void task_right()
{
    iRduino.keyPressRelease(KEY_RIGHT_ARROW);
}

void task_space()
{
    iRduino.keyPressRelease(KEY_SPACE);
}
I guess you have had ideas about these four function. Yes, they just press and release some key on your PC.
Then let’s have a summary, to add a task, we need 3 steps:
- Write down the remote key value
- Write a task function, which will have some certain use, like press some key on PC
- Use addItem funciton to add the task, then your press the key on remote, IRduino will run the task function once.